
If you’ve read any of my posts regarding our house, you know that moving into this place was a shit show. One of the biggest disappointments was the condition of the carpet. Luckily, the only places there are carpet in the house are the stairs, the master closet and the upstairs (which has 3 bedrooms and a landing/hallway). Unfortunately, when we moved in the carpet was covered in bugs and dirt and grossness. Vacuuming didn’t help. Where the carpet met the baseboards was black. It was nasty.
After living with it for a couple of months, we decided to get a quote on getting the carpet replaced. I would physically tense up as I walked up the stairs and had to look at all the gross pee stained nastiness. The kids complained that they hated their rooms and I know the carpet had a lot to do with it. Here’s a picture of what the hallway looked like:
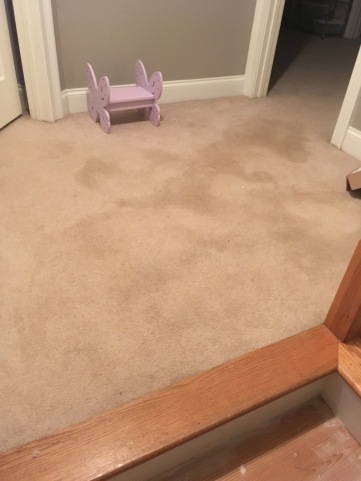
Gross, right? So I was initially going to replace the carpet on the stairs and just paint the banisters and the part of the stairs that showed from under the stairs. But then once we started ripping it off I changed my mind and decided to go all in. I read some blogs. I felt mildly confident in my ability to pull it off.
We pulled the carpet off and then the padding. Then the hubs went to work on pulling out all the staples and nails. There were so many staples and nails. And he missed a bunch, so then he’d have to come back as I sanded and puttied to grab the ones he missed. It was a pain in the ass.

After he pulled all that crap off, I went to work puttying the holes. There was clearly a bunch of water damage because of the way the MDF risers were bulging in spots. This wasn’t going to look perfect. But they’re stairs and we just walk up and down them so does it really matter? I think not.

After I puttied, the hubs came behind me to sand. Because as he put it, I “don’t know what the hell” I’m doing and put it on too thick, so I couldn’t do it myself. Whatever. I didn’t have to sand it, did I?
I did a fair amount of research and googling and then sent him to the store to speak to a live person. I did not want to sand the banister or the stained portions of the stairs that had previously shown from the outside of the carpet. He came home armed with a primer that was supposed to take away the need for sanding. So I primed everything (except the spindles). The parts that had been stained received two coats of primer (since the primer mostly slid around on the first coat).

This was taken during a lunch break so the 2nd coat had not been applied. The day after putting on all the primer (that took approximately 7 hours of painting), I went to the store and bought Behr Low Luster Porch and Patio paint. Through my research I determined that this would be good for a few reasons. First, it’s meant to be walked on. Second, it’s a one-stop paint, it has something to seal it in the paint, eliminating the need for a coat of poly. I liked that I could get a lower sheen so that it wasn’t super shiny. I planned to use trim paint on the white portions and that would be shinier.
I didn’t want black because I felt that would be too dark so I chose a very dark brown and then had the paint guy at Home Depot match the Behr paint to the paint sample. The color is from a Glidden swatch and it’s called Western Charcoal.
After painting the primer, the next day I started on the steps. The banister is very…round. And curvy. And you can see from the pictures that whoever designed this house decided that what the stairs absolutely needed was a fucking prison made of spindles. Let’s lock that banister up! If I ever meet this person I will punch them in the throat. It was near impossible to get in between those spindles to paint that banister. Imagine just smearing and slopping paint with your eyes closed. That’s pretty close to what I did. It’s another reason why those spindles will wait a very long time before I paint them.
I started by doing the banister upstairs and then the top step. Then every other step I painted the top. I wanted to be able to get back upstairs because I knew the banister would need more than 2 coats and I’m impatient. Finally, I had gotten all the brown parts painted with 2 coats. That’s when I decided I didn’t care if I ever painted that 3rd coat (I will do it eventually once my back has stopped bothering me).


The white trim (minus the devil spindles) has been painted. We still need to get a piece of quarter round and install it at the bottom and paint that as well. The project is finished for now. Those spindles will take forever, especially since I’ll have to get the brown paint off where I messed up and didn’t wipe it off in time. I’m putting that part off. Plus, I’d rather put that 3rd coat of brown on before doing the spindles. For now it’s okay. It looks so much better and goes well with the new carpet. I’ve been very pleased with the paint so far.


